But For Help with Major Historic Home Renovations, Call Architectural Craftsmen
One of the truly wonderful things about older homes is the flooring. Often, a hardwood floor is hiding under carpet or tile – although it may take some work to get it looking gorgeous again.
And once the floors are refinished and gleaming, homeowners will want to do their best to protect them from ice melt or salt products that can be carried indoors on shoes.
Follow these tips for refinishing your wood floors and keeping them clean all winter – and don’t hesitate to contact a home renovation expert for help if things get complicated.
Step One: Ensure Your Hardwood Floors Can Be Refinished
There are two reasons you may not be able to refinish the hardwood floors in your older home.
With so many popular hardwood imposters on the market, it’s possible that your floors – if installed by a previous owner without regard to era-appropriate design – are not actually solid wood.
Solid hardwood floors are made of solid planks of wood – and if they’ve been refinished before, there may not be enough thickness left to sand. A good rule of thumb is at least ¾”. In general, a solid hardwood floor can only be refinished up to six times – although it is not likely your floors have seen that level of refinishing in their lifetime.
Step Two: Gather Your Home Renovation Supplies and Prep Your Rooms
It’s at this step that many homeowners opt to throw in the towel and hire professionals – not only for refinishing their floors, but for any historic home renovation project. That’s because the sheer number of tools and materials can be overwhelming.
For refinishing hardwood floors, you’ll need basics like:
- An assortment of sandpaper in rough, medium, and fine grits
- A hammer and nail set
- Masking tape
- Plastic sheeting
- Pencil
- Wood filler
- Floor stain in the color of your choice
- Polyurethane sealer – enough for several layers
- Polyurethane application brush and wool applicator
- Mineral spirits
- Molding bar – not a crowbar
- Hand-held orbital and detail sanders
- Vacuum
But you’ll also need a walk-behind drum or orbital sander. If you don’t want to purchase one, you can rent it from a local vendor – but you’ll be responsible for transporting it to and from your home. An orbital sander is easier to use than a drum sander, but it will only fix moderate wear to your flooring. You’ll need a drum sander for heavy refinishing, but beware that they can be difficult to control.
Once you’ve gathered your home renovation supplies, it’s time to begin prepping the rooms of your home. You’ll need to remove quarter-round from the perimeter of every room using your molding bar. Remove any doors. Carefully check your floor for any nails sticking up; you’ll need to hammer them in before using the sander. Use the nail set to ensure the head of the nails are below surface level.
Remove floor registers and cover all openings with plastic sheets and tape, including your electrical outlets and HVAC vents.
Step Three: Sanding, Three Times
Finally it’s time to kick up some house renovation dust! Using your walk-behind orbital or drum sander, you’ll go over your hardwood floors a total of three times, once each with rough, medium, and fine-grit sandpaper. Go slowly and smoothly, ensuring you don’t bump into baseboards or walls. Use a hand-held sander for detailing the edges of the room, pressing down firmly without stopping in any one spot. Vacuum thoroughly before switching sandpaper.
After your final round of sanding, vacuum and wipe away any debris using a damp microfiber cloth – never oil or chemical cleaners. Optionally, use a cloth dipped in mineral spirits before moving on to house renovation step four.
Step Four: Make Floor Repairs Using Wood Filler
If you notice any gouges or small holes in your floors, you can fill them in using a wood filler product designed for floors. Follow manufacturers’ instructions on the packaging to achieve a smooth finish.
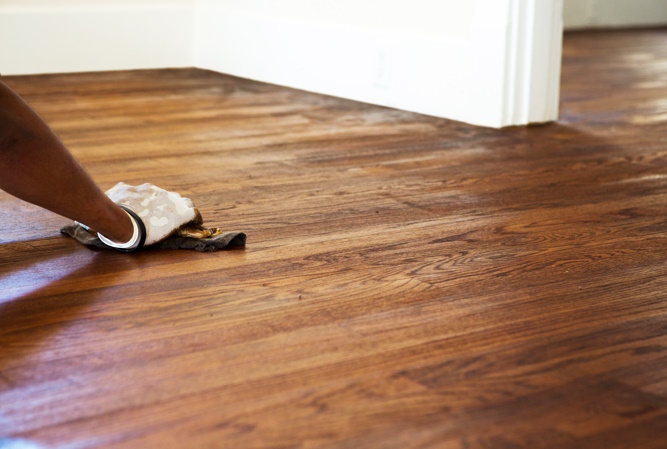
Step Five: Staining and Sealing
Apply the stain color of your choice to your hardwood floor, following the manufacturer’s application instructions.
Finally, seal your floor with multiple coats of polyurethane. If you choose a water-based product, you’ll find it applies more evenly and dries more quickly, but you’ll need to work fast. You must wait at least 24 hours between coats of oil-based polyurethane, so plan ahead if you choose this product. Ultimately, the one you choose is totally up to you.
Beware: If you choose oil-based polyurethane, dry soiled rags and brushes separately or in a bucket of water. As oils evaporate from a pile of rags, they can catch fire.
Tips for Keeping Your Floors Clean This Winter
After you’ve invested so much time, money, and effort into historic home renovation projects like refinishing your hardwood floors, you’ll want to do everything you can to protect them from winter and all the things that come with it. Follow these tips for keeping your floors in good condition.
- Use floor mats and door mats at entry doors.
- Adopt a no-shoes-inside policy and remove your shoes at the door.
- Use a humidifier indoors during winter to avoid excessively dry air when your heat is on.
- Neutralize the acidic pH of “ice melt” made of calcium chloride using a solution of five ounces of plain vinegar and four gallons of clean water. You also can use a specialty cleaner made for hardwood floors.
Leave Distinctive Home Renovations to the Professionals
For do-it-yourself projects, be prepared for lots of elbow grease and tool rentals or purchases. But don’t be surprised if what should be a simple project turns out to require more in-depth knowledge and skill. Living in an older home presents challenges – but nothing that can’t be addressed by an expert in distinctive home renovations.
For historic home renovations beyond refinishing your hardwood floors, work with Kansas City’s historic home remodeling company, Architectural Craftsmen. Our demonstrated history of house renovations with historically appropriate designs is evidenced further by the number of awards we’ve earned over the years. Take a look at our past work in our online portfolio.
Ready for a historic home renovation? Request a consultation with our design-build team today.